Table of Contents
How Can I Use gzip Compression to Save Network Bandwidth?
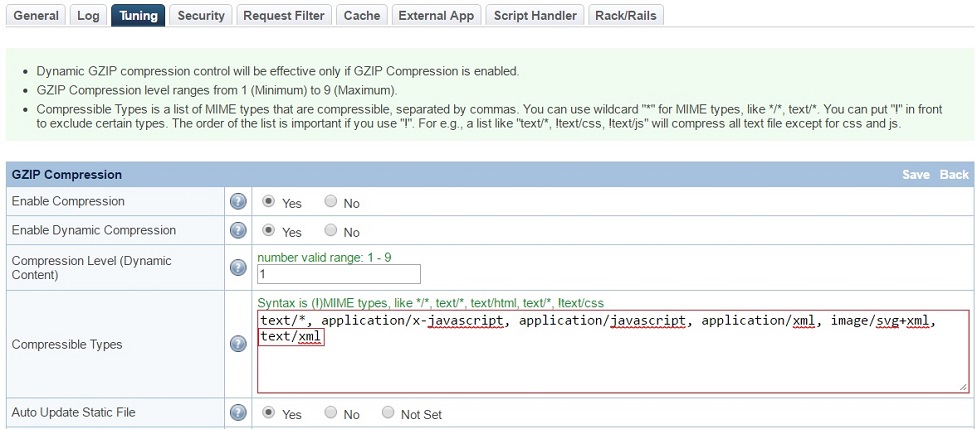
LiteSpeed Web Server can send compressed responses for both static and dynamically-generated content. The level of compression and situations under which it occurs can be configured in the gzip Compression section of the WebAdmin console (Configuration > Server > Tuning). You first must make sure Enable Compression is set to Yes. Then set compression rules for static and dynamic content separately.
Note: Enable Compression and Enable GZIP Dynamic Compression are enabled by default at installation.
Compression Rules
Static Content
When a request for a static file comes in (and compression is enabled), the web server first looks for a corresponding gzip-compressed version in the Static gzip Cache Directory. The compressed file found in this directory will be used if it is newer and smaller than the original one. If the compressed file does not exist or is out of date, the web server can create/update the gzip-compressed file automatically if Auto Update Static is set to Yes.
Because compression is pretty server intensive, the web server will only compress files with a potentially high compression rate based on following rules:
- the MIME type is set in Compressible Types (for example:
text/*,application/x-javascript,application/javascript,application/xml,image/svg+xml); - the file size is between the Min Static File Size and the Max Static File Size.
Be careful not to set the Max Static File Size too large. The server cannot process other requests while it is compressing a static file. Compressing very large files will thus result in delayed service.
Dynamic Content
The web server can perform run-time compression for dynamically-generated content as well. To turn on compression for dynamic content, both Enable Compression and Enable Dynamic Compression must be set to Yes.
Compression Levels
Both static and dynamic file compression can be tuned to your server and network capabilities using Compression Level (Static File) and Compression Level (Dynamic Content). Better compression (a higher number) will save bandwidth, but will use more memory and CPU cycles. Your specific CPU and bandwidth saving needs determine the ideal configuration for your system.
Compression Verification
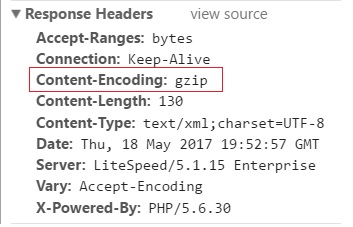
After setting up compression rules as shown above, you can verify that it is working by opening the file URL in your browser in the format: Server_IP:Port_num/path_to_file. Enter your browser's Development/Inspector Tool and navigate to Network > Headers. You should see Content-Encoding: gzip as shown below:
If the page is returned with no compression, (i.e. no Content-Encoding header), verify that you are using a pre-defined MIME type.
Note that text/xml is not a pre-defined MIME type, so text/* won’t match it.
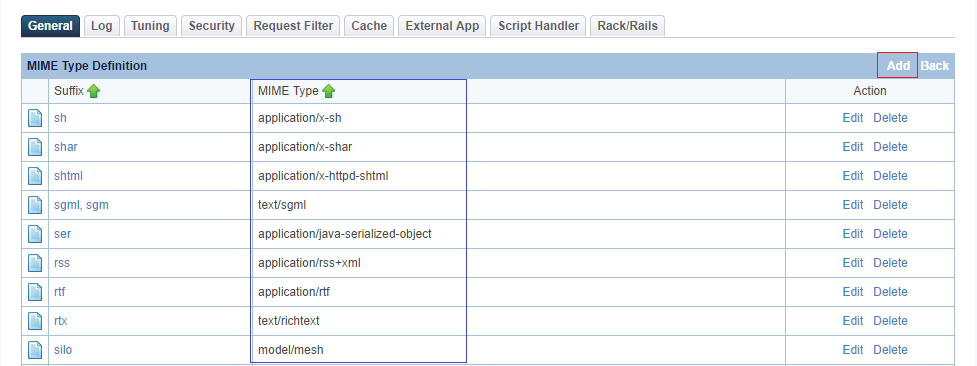
Adding a New Pre-defined MIME Type
Navigate to Web Admin Console > Server > General > General Settings > MIME Settings and open $SERVER_ROOT/conf/mime.properties. Scan the file for your desired MIME type.
If your MIME type is not there, you can add it in one of two ways:
- Note:
text/xmlis just an example. You can add any MIME type you wish:text/css,text/js,text/x-js, etc.


