Important Note About Updating
Updating LiteMage will overwrite LiteMage's “config.xml” file. Before you update, make sure to manually copy and save your “config.xml” file if you have made any customizations.
Preliminary Magento Configuration
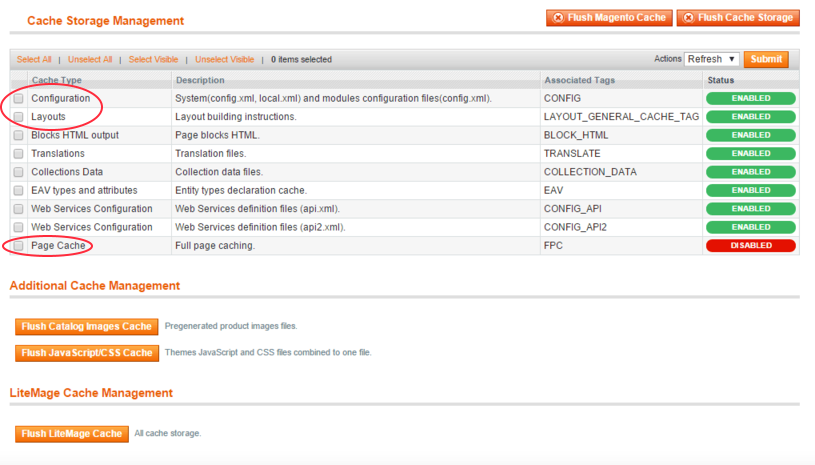
- For LiteMage to work correctly, you must have both “Configuration” and “Layouts” enabled under System → Cache Management in the Magento Admin Panel. If you are using Magento Enterprise, you must also disable “Page Cache”.

LiteMage Extension For Magento Configuration
- LiteMage's default configuration should be suitable for testing.
- Always read the comments for each configuration option before adjusting them.
- Detailed notes on certain settings are provided in the “Notes on Specific Configuration Settings” section below.
When Changing LiteMage Configuration
In The Magento Admin Panel
After making any changes to LiteMage through the Magento Admin Panel, always Flush the LiteMage cache by navigating to System → Cache Management and, under “LiteMage Cache Management, clicking “Flush LiteMage Cache”.
In The “config.xml” File
After Making any changes to LiteMage through it's “config.xml” file, you must do the following:
- From the Magento Admin Panel, navigate to System → Cache Management.
- Check the box next to “Configuration” and check that “Refresh” is selected in the drop-down menu on the top right before clicking “Submit”.
- Near the bottom of the page under “LiteMage Cache Management”, click “Flush LiteMage Cache”.